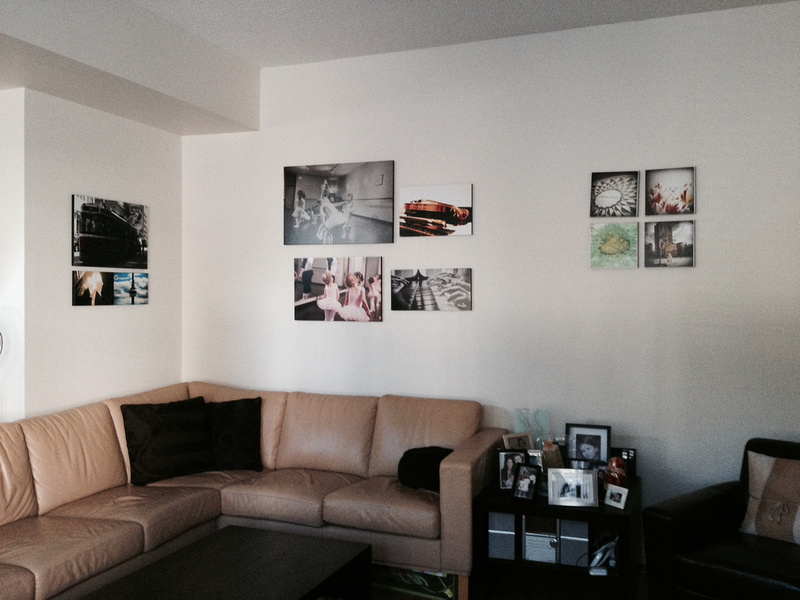
My Turn: What's on MY Walls?In the past, I've shared how clients have chosen to showcase images from their sessions with me on their walls. I sell three main print products that are meant for wall display: canvases, standout mounted prints (large photo prints with a 3/4" black backing, ready to mount), and large format masonite backed or matboard-backed prints. Masonite-backed prints can either be popped into a frame, or can be hung on their own, with the help of velcro mounts, sticky tack, or anything similar to that. Matboard-mounted prints are typically put in a frame. Here's an example of a client 12x12 canvas display. And here's an example of how a client chose to arrange a set of 8x10 prints mounted on masonite. Today, I thought it would be fun to share how I decorate my own walls. First off, my favourite way to display my photos is on a standout mount. I'm ashamed to say that until recently, I didn't have much in the way of art of any sort on my walls. I had two 20x30 framed posters on one of my living room walls, but with ceilings as high as mine, the walls still looked pretty sparse. Finally, a couple of weeks ago, I decided to finally get off my rear and put up some photos. All photos, by the way, were taken by me. Here's how my living room walls look now:
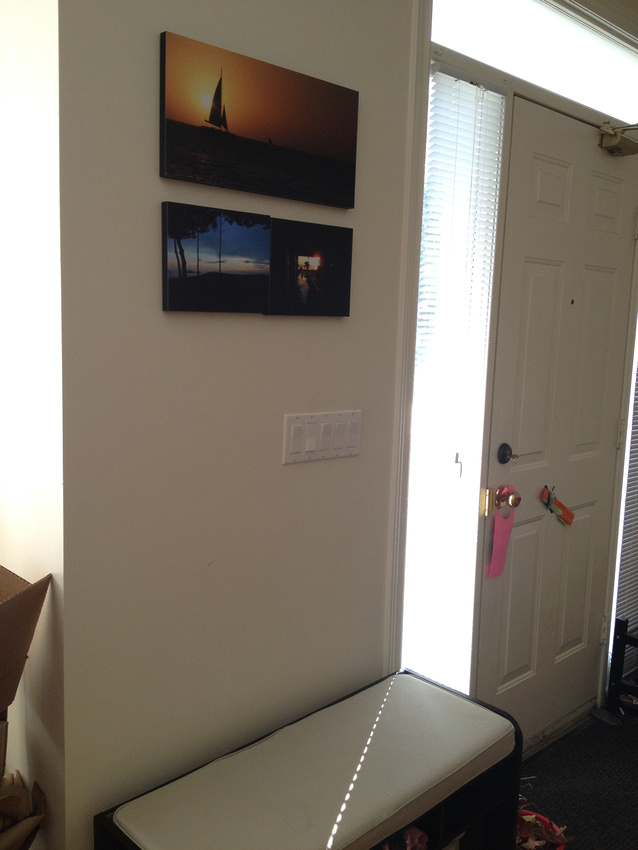
The largest print on there is a 20x30. The square prints are 10x10, and the smallest prints (below the streetcar) are 8x12. Many people think that an 8x10 print is fairly large; however, when you look at walls like these, the 8x10s (or even 8x12s) can look pretty tiny. Of course, that doesn't mean that you should dismiss 8x10s or 8x12s completely. It just means that hanging a single 8x10 on a large wall can look pretty bare. In my display above, I chose two 8x12s to complement a 16x24 print. And I chose a set of four 10x10s instead of a single, large print. I also have a bit of walls space near my front entrance, so I decided to put this up:
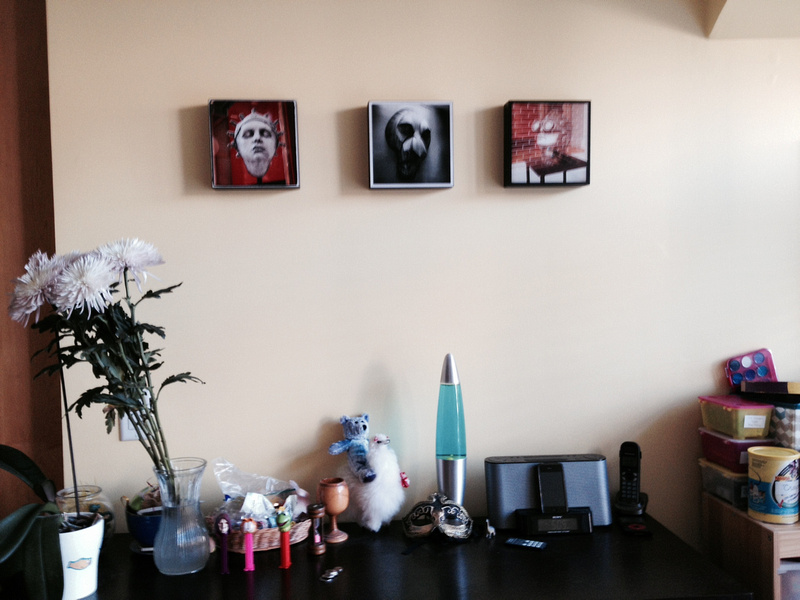
Note my daughter's interior-decorating skills on our front door. :) The top image is a 10x20. The smaller two are 8x10s. In my kitchen, I decided to put up a set of 8x8s.
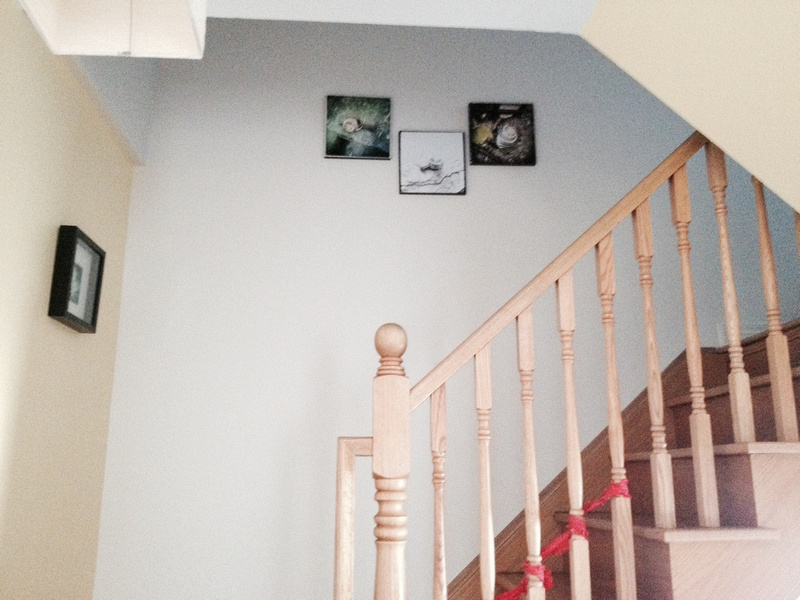
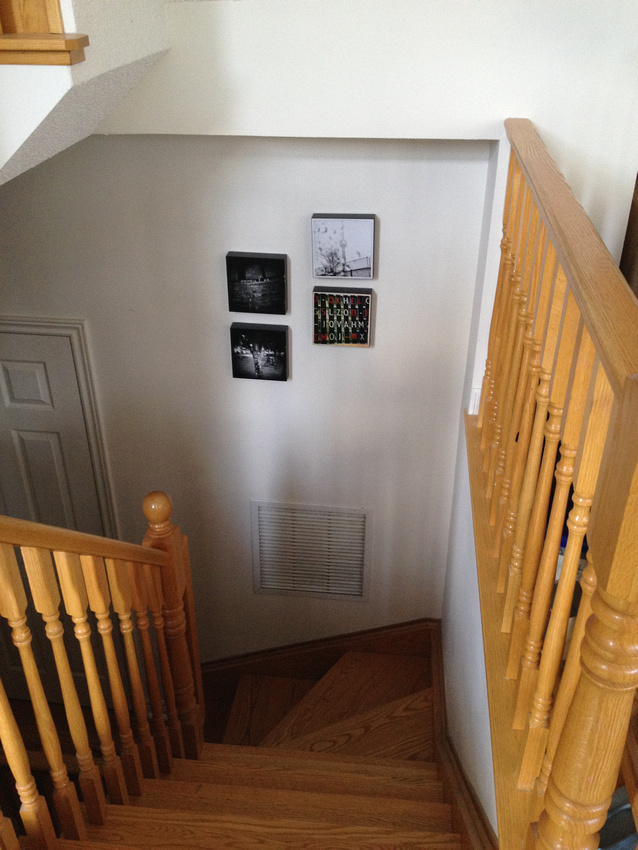
Yes, that IS a lava lamp. It's very fun to watch during dinner time. :) Now, back to business. I originally had the left-most image, and the right-most image printed as 6x6s and in frames, but I was never happy with how it looked. I find that with square arrangements especially, the set looks more "complete" if you go for a set of 3 images all in one row, or a set of 4 images, two at the top, and two at the bottom. That being said, offsetting images can be fun too! On my stairs, I decided to try something a bit different.
I decided to offset the snail images. I find mounting images around staircases to be rather tricky, because it looks a bit odd if they're all lined up, which doesn't look in line with the flow of the stairs. I found that off-setting them like I did above, helped with that. Speaking of offsets, here's another example of offset images. These were hung on the wall leading down to my basement.
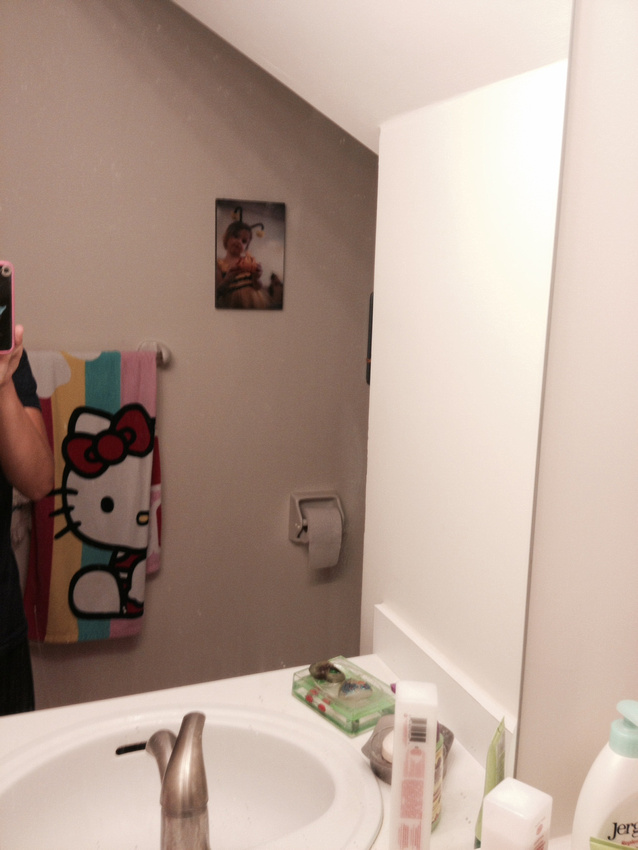
I have to admit that my motivation to offset these was because I originally hung 3 images, and wanted to utilize the hooks that were already on the wall. Then I decided to add a fourth image, and kept the offset pattern. I also put up some images in my daughter's bedroom. At first, when I asked her where she wanted her pictures, she said that she wanted them in her bathroom (she has an ensuite bathroom). I'm cool with maybe one image in the loo, but not three. So i convinced her to put just one up:
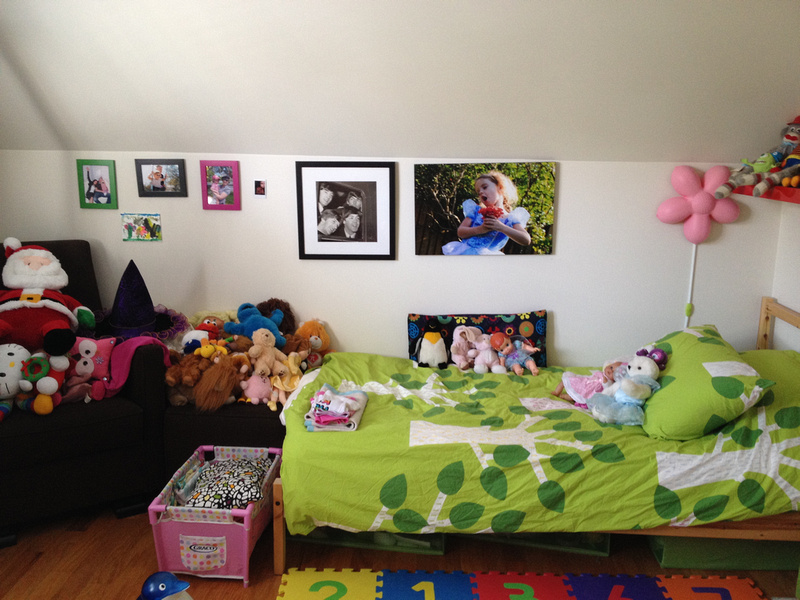
This is an 8x12. Inside my daughter's bedroom, I have a 16x24 print above her bed.
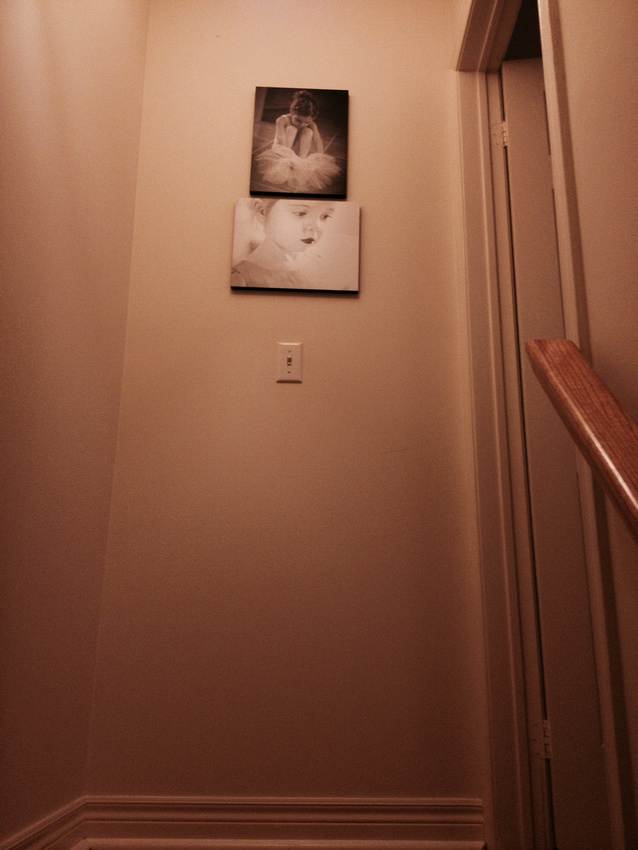
If you're wondering about the Beatles picture, that was totally her idea. She LOVES The Beatles. The other pictures on her wall were also her idea. We took her to the Guggenheim when we went to New York City back in January, and she was so taken with it, that she wanted to turn her bedroom into her own little Guggenheim. Gotta love that! Here are two more images that we hung. These were hung on the wall just outside her bedroom:
Both of these are 11x14s. I still have to take care of the walls in my bedroom. Right now I have a single 8x12 framed Casablanca poster above my bed, but I'm actually waiting for my photos from my August family session to arrive, so that I can order some big prints to hang over the bed. When I do get them hung, I will be sure to post a pic! So as you can see, there are TONS of ways to hang photos on your walls. And the best part is that you can go with a combo of really large prints, complemented by smaller prints. Or you can have a set of smaller prints clustered together. Both setups work really well. If you're keen on hanging photos on your walls, but don't know where to start, have no fear, because I can help! I have a nifty little app on my iPad that I use to show clients what their images look on their own walls when I come to their homes for their proofing and ordering session. That way, they can see RIGHT AWAY what works for their walls, and what doesn't. 
Comments
No comments posted.
Loading...
|